As a java developer, I couldn't help but use the OpenCV Java Interface instead of C++ .
You don't feel comfortable with C++ !! , you don't find the C++ OpenCV scalable enough for your desktop and web application , or you simply love java !!
this tutorial is for you !!
nota : the java interface is available since OpenCV 2.4.4 , but we're gonna use the 2.4.6
First things first ! we have to install download and install the latest version of openCV through the official website http://opencv.org/ .
OpenCV installation is the same as mentioned here !
1 . Create a new Java project with an empty MainClass and create a lib folder
2 . Copy the Java Jar from the OpenCv installation folder ! default ! into your lib folder and then add it to the build path

3. Copy the Library file from x86/x64 folder into your project lib as well

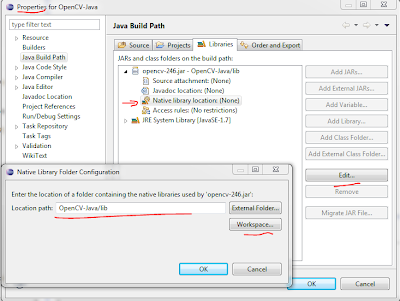
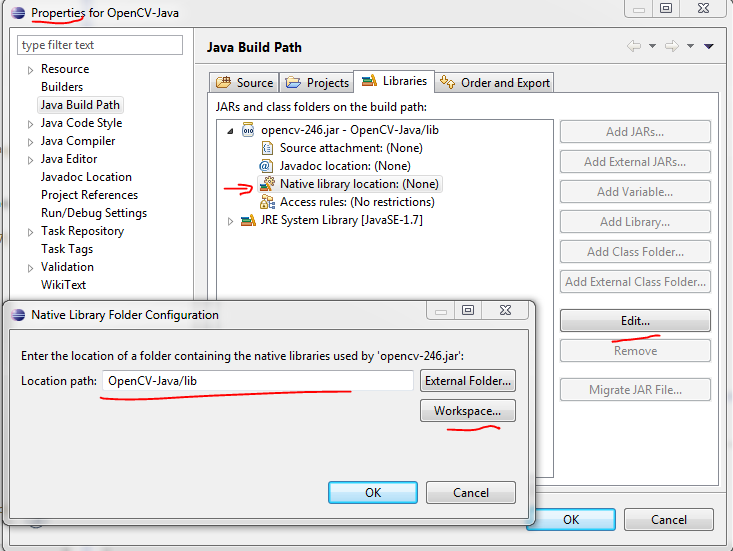
4. link the java library to the native library using the project properties !
and we're finished here !
Now a test code to verify the installation
package com.share.thevision.opencvjava;
import org.opencv.core.Mat;
import org.opencv.highgui.Highgui;
public class MainClass {
public MainClass() {
Mat image = Highgui.imread("images/lenna.png");
System.out.println((image.size()));
}
public static void main(String[] args) {
System.loadLibrary("opencv_java246");
new MainClass();
}
}
nota : add a test image to your project !
Executing the code you should see the dimension of the loaded image !
PS : if you see this" Can't load IA 32-bit .dll on a AMD 64-bit platform" stack error , then you copied the wrong dll !
good morning :)


No comments :
Post a Comment